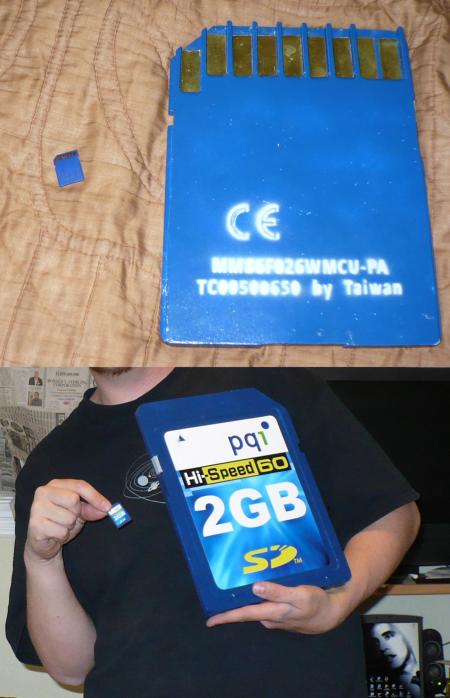
10x SD Card
Class Final Project: Create a prop of something impossible to acquire or create an object ten times its normal size.
My Project: 10 x SD Card
Materials:
- 12″x48″x1/2″ Wood (poplar, a poor, yet workable choice)
- Sheet Brass
- Photo Paper (satin finish)
- Spray paint (blue, white primer)
- Wood Glue
- Brass Wood Adhesive (no idea what I used, possibly spray stuff)
Procedure:
First off, let me just say ‘Thank You’ to whom ever needed a high def macro photo of the item I happened to choose. It makes creating a model much simpler. I took the macro image (actually more than 10x the size of the actual card) and scaled appropriately in AutoCad. It was easy to determine dimensions of most bits, as its was based in metric millimeters and was easy to scale up. I layed out the front and back at 1:1 scale and plotted it out similarly.
Since I wanted to duplicate the fabrication of a real SD card, I planned on sandwiching two halves together. The front half features the label, on a slightly recessed plane, and a rounded linear groove along the bottom. The back has teeth along the top, to allow access to the contacts. There is also notches for the lock switch, etc.
Now, with templates and dimensions in hand, I began preparing the wood. I make the mistake of choosing too soft of a wood. Poplar, while it seemed appropriate, did not plane easily. I had a 3/4″ thick piece of lumber that I needed to plane down to one centimeter thick. I used a table saw with a datum blade to remove a good amount of thickness, but only 1/2″ strips at a time. The uneven finish i was left with was simple to sand down, but those faces would be on the inside of the card, so i didn’t bother doing a great job.
I used some light spray adhesive to attach the templates to the wood. A skill saw made cutting all the various angles and notches a breeze. At this point, it was beginning to look like an sd card.
My biggest hurdle was planing an 1/16 off the face where the label sits. I used a router table with a 3/4″ circular bit to remove the outer edges with the rounded corners. Then i used an electric hand sander and hand planer to lower the raised center. This was a bad choice, to say the least. I was using too dull of a blade on the planer and I had to constantly replace the sandpaper as it was getting worn down fast. Eventually I got a relatively flat surface that I could cover with the label later on.
Finally A 3/8″ rounded tip bit on the router was perfect for the rounded groove at the bottom of the card, finishing off all the cutting. Then I did a final sanding with a progressively finer grit.
I used a white base coat before a adding few coats of primary blue spray-paint. Then, I meticulously cut a stencil for the “Made In Taiwan” and Serial Number and used some gray paint to add it to the back.
I cut strips of sheet brass and used a metal/wood spray adhesive to attach them between the teeth on the back side. Finally, I used paper spay adhesive to affix the label to the face.
For my first real solo woodworking project, I consider this a major success, yet if I had to do it again, I defiantly would have made some better choices.
UPDATE:
In reply to the comments… I just wanted to join this club with Disk Guy and CD Lady…


July 8, 2009 at 7:22 am
Now you just need to place a real sd card in between the halves with wires going to the tabs. Next fabricate a 10x sized reader the same way. Do ???? and last profit!
July 9, 2009 at 12:46 am
and next, a nikon X 10 … 😛